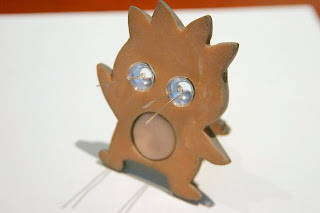
My 8-year old daughter loves Hello Kitty...what little girl doesn't! :) I decided that her first computer should therefore be modded to suit her accordingly.
I surfed all over the Net but did not find any examples of such a mod, at least not as extensive as I was planning on making it. So, with a handful of inspirational images I decided to do it.
First of all, if anyone decides to do this or any other project based on this blog, please be aware that I will not be held responsible for any financial, emotional, or physical losses/damages due to one's following or attempting to follow procedures outlined herein. The purpose of this blog is to simply share my experience on this project and provide inspiration/ideas for someone who is looking for such information. So, now that we have this out of the way, lets get to the good stuff :)
Note: I wanted to post this blog in a chronological order - top to bottom. Unfortunately, this site adds newer postings to the top, resulting in a sort of upside down sequence. So, I had to set the dates in reverse - every new posting with an older date than the preceding post. This way, it will keep things displaying in the proper sequence. Hope this doesn't confuse too many :))
1. Cost:
You can go with a cheap case and some spray paint from the local hardware store. Probably not a bad idea for either a first-timer or a very budget-conscientious person. Or, you can splurge and go all the way! I decided to splurge a bit :) Base layer coat (the PINK paint), base coat (gold sparkle), another base coat (white paint), high velocity clear coat (the finish coat), hardener, plastic adhesion promoter (makes the paint stick to plastics), some mixing cups, primer, and tack cloth = 180 bucks! :) I got it all at a automotive paint shop. I think the finish is gonna be worth it! I did go for a cheaper computer case though. Didn't want to risk screwing up an expensive one.
1.1 Additional materials - sandpaper (180/220, 400 - sheets or pads for use with a sander), steel wool (00 and 000 for final rub). Also, for this design I obtained two packs of Super Sculpey at 14 bucks each, small can of automotive Bondo, green masking tape (preferably one for usage with automotive paint work), paint thinner or cleaner, sheet of copper mesh (from Arts and Crafts store), 30-gauge copper wire: two spools - one black one red (RadioShack), and assortment of heatshrink tubing (for your wiring), 1/2in by (twice the height of your computer case) translucent white or clear piece of plastic (for LED diffusion).
1.2. Additional parts:
Nine pink LEDs - 5mm, two white LEDs - 10mm, two amber LEDs - 5mm, two green LEDs - 10mm, 5mm LED holders, two spare male mini power connectors (matching your computer's power supply), nine 1k Ohm resistors, 120mm PC case fan, custom-built Hello Kitty grill (for the 120mm fan).
Depending on what you already have and how closely your design will/will not match this one, your final cost may vary substantially from mine. I would say that the extras cost me less than 70 bucks.
2. Equipment:
Step drill bit, countersink bit, drill bits for usage with sheet metal, orbital sander, drill press or hand drill, air compressor with a water/oil filer, a good quality paint gun (I happened to already have a gravity feed spray gun), paint strainer and filter, cookie sheet (for baking of Super Sculpey designs), plastic spreaders (for Bondo), Dremel rotary kit (with flex shaft) or equivalent, small metal files with flat and round surfaces, hot glue gun, heat gun or a mini torch, soldering iron, a pack of latex gloves, safety goggles/glasses, and a filter mask.
Some of this equipment does not have to be very expensive or top notch, unless you plan on doing many more projects or go pro. Mine came mostly from local home improvement stores and seemed adequate enough to do the job.
Here are pics of some of the materials and tools:
This is the bit I used for carving out shapes in the plastic faceplate
Step drill bit for cutting in sheet metal and plastic
Heat-shrink tubing for wire insulation
(Note for future - pick the right colors for the project!)
Small torch used on heat-shrink tubing
Extra set of "hands" was really helpful, especially when soldering.
Countersink bit
For creating shapes of Hello Kitty and friends
Small files for getting into tight spaces during fabrication
This is kinda upside down deal. You have to click on Older Posts to see Newer posts. I had no other way of listing this in a specific progressive order so that you would not have to start at the bottom, or the last page.


